
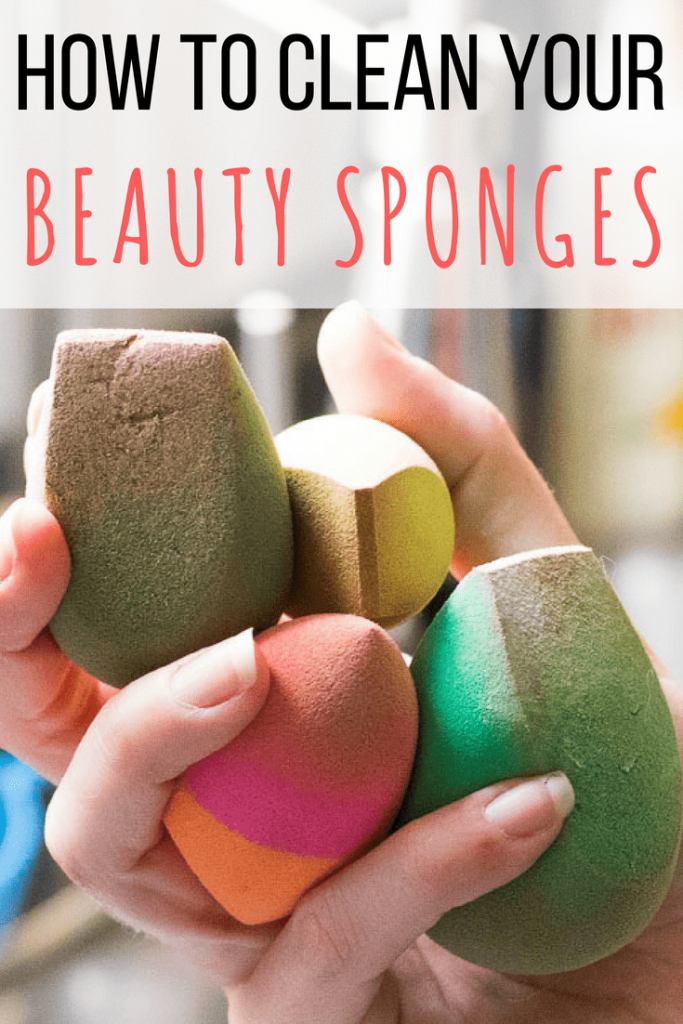
 I don’t know about you guys but my beauty sponges get sooo nasty looking so quickly! I get so excited when I have a nice and brand new beauty sponge to use, and then with one use, it looks pretty grimy and stained.
I used to think that’s just the way it was going to be. Beauty sponges get stained after one use, what can you do? Just need to buy a new one whenever I want a clean one, I guess.
Well guess what…there IS something you can do! And the cleaning process is SO SIMPLE!
Don’t give up on your beauty sponges yet…this cleaning process will give them the deep clean they need, and take out almost any stains, I promise!
Want more information on beauty sponges in general? Well, check out my post all on how to use them, and how to get the best bang for your buck with beauty sponges!
Alright, enough of the chit chat…let’s just jump in on how to get these guys sparkling clean!
 Step One: Rinse
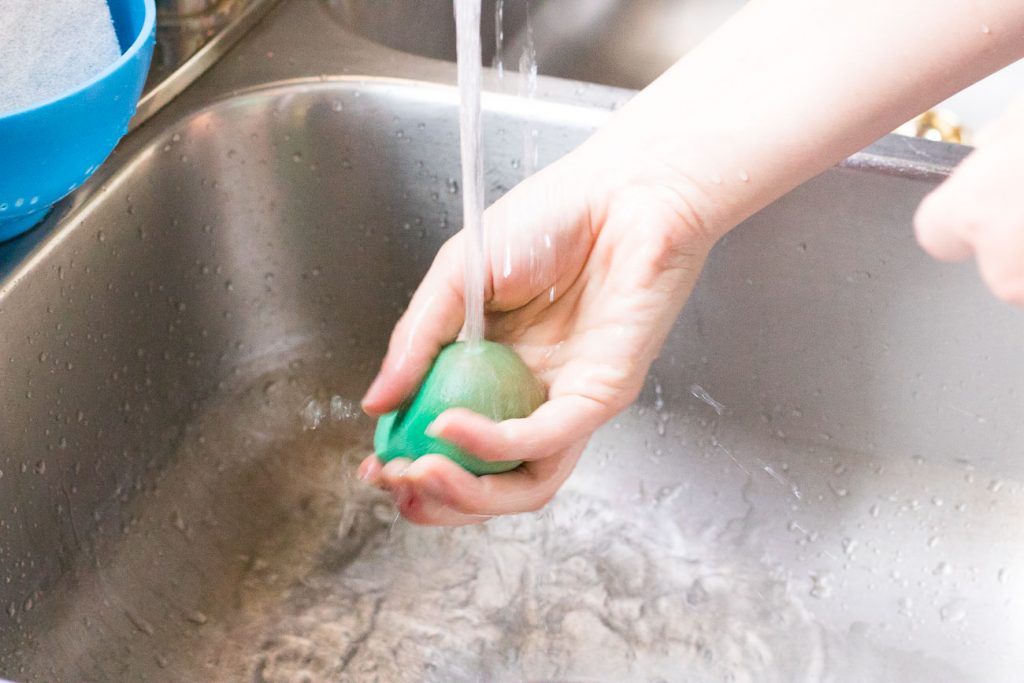 First, run your beauty sponge under a tap, just like you would if you were wetting it before use. Squeeze the sponge a few times to get any extra makeup out, until you see the water run clear. At this point, you will have gotten out the initial layer of makeup and gunk, but the next step is when it’s really time for the deep clean!
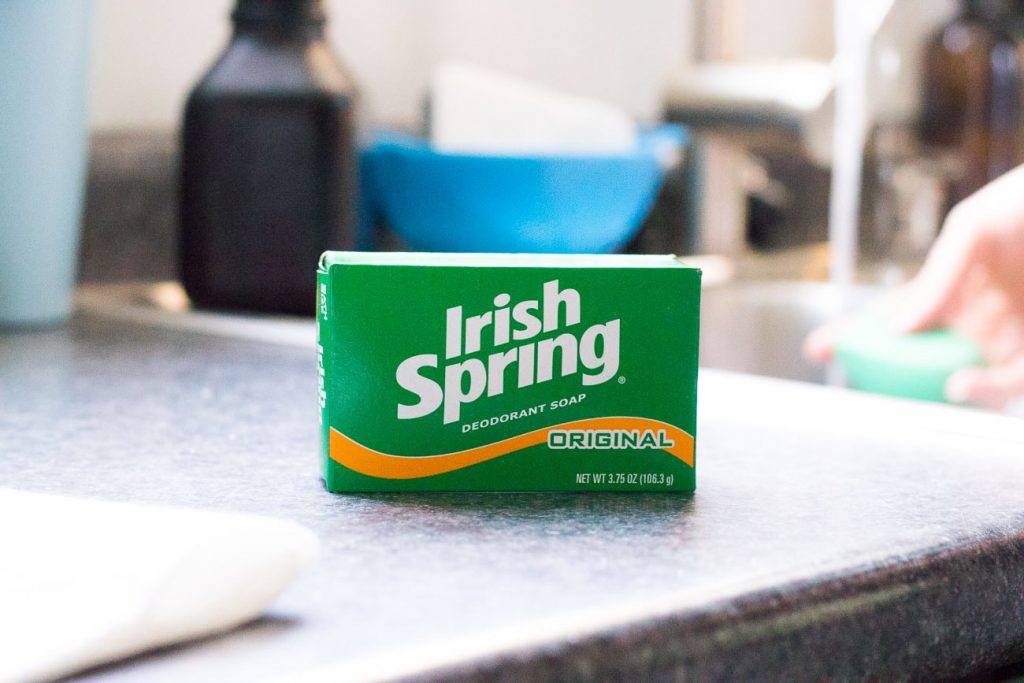
Step Two: Clean
My favorite soap to use for this is the Irish Spring soap bars. These bars of soap are insanely cheap, and you can snag them on Amazon (linked here), or pick them up on your next run to Walmart, Target, CVS, etc.
 Wet the bar of soap under the water. Then, take your beauty sponge that you already rinsed and begin to rub it back and forth on the bar of soap. I don’t even worry about being super gentle, I just get aggressive about scrubbing it along the soap!
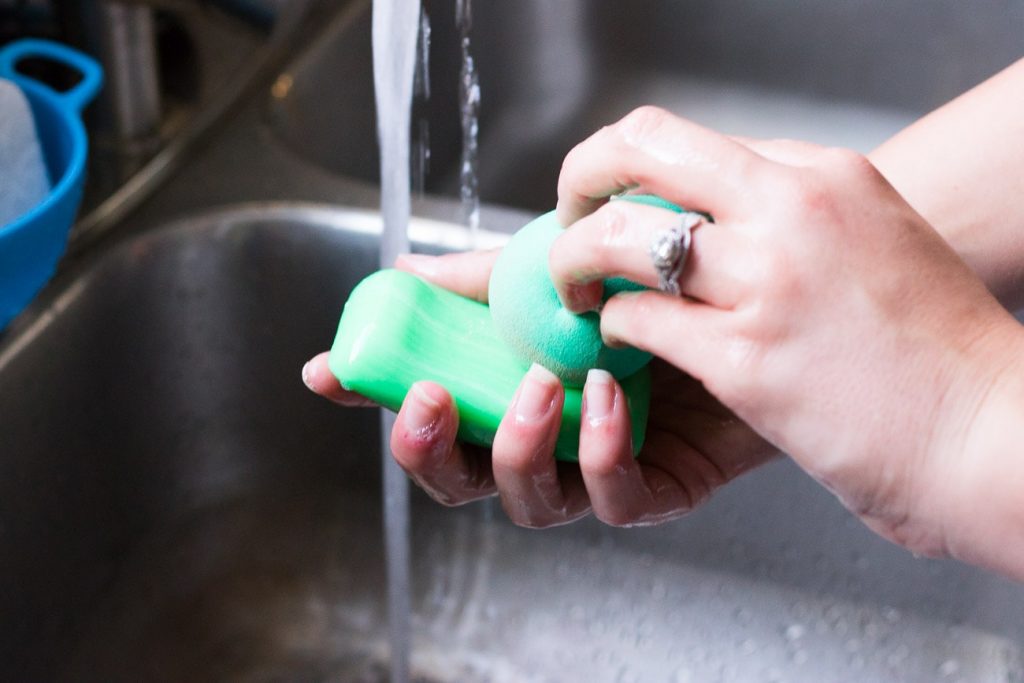
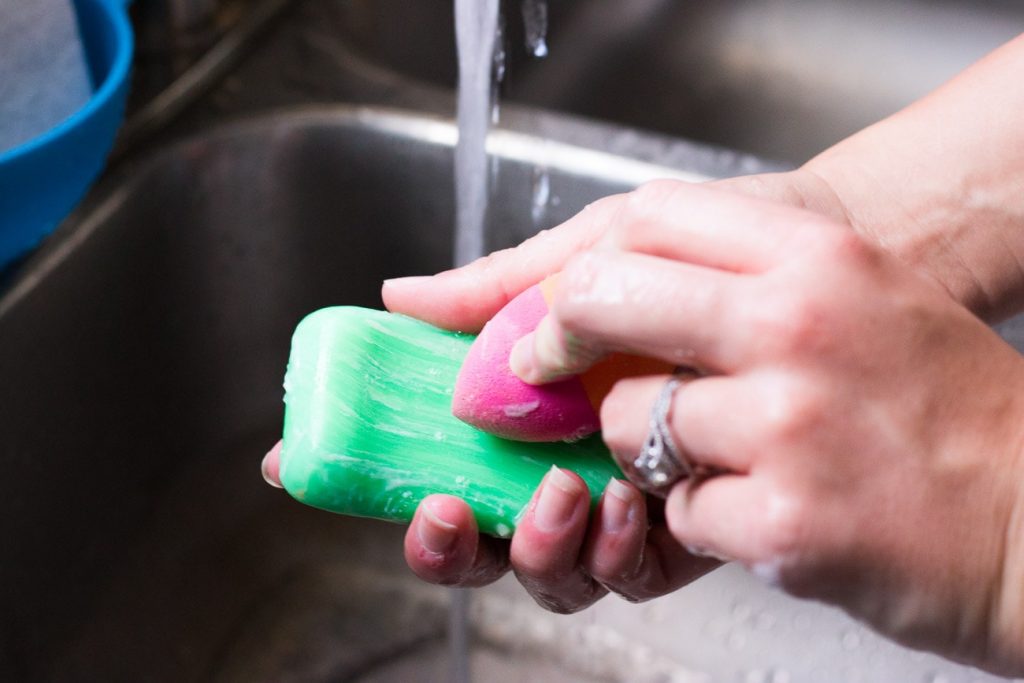 This method allows the soap to actually dig in deep into the beauty sponge to ensure it gets out all the junk from the inside out!
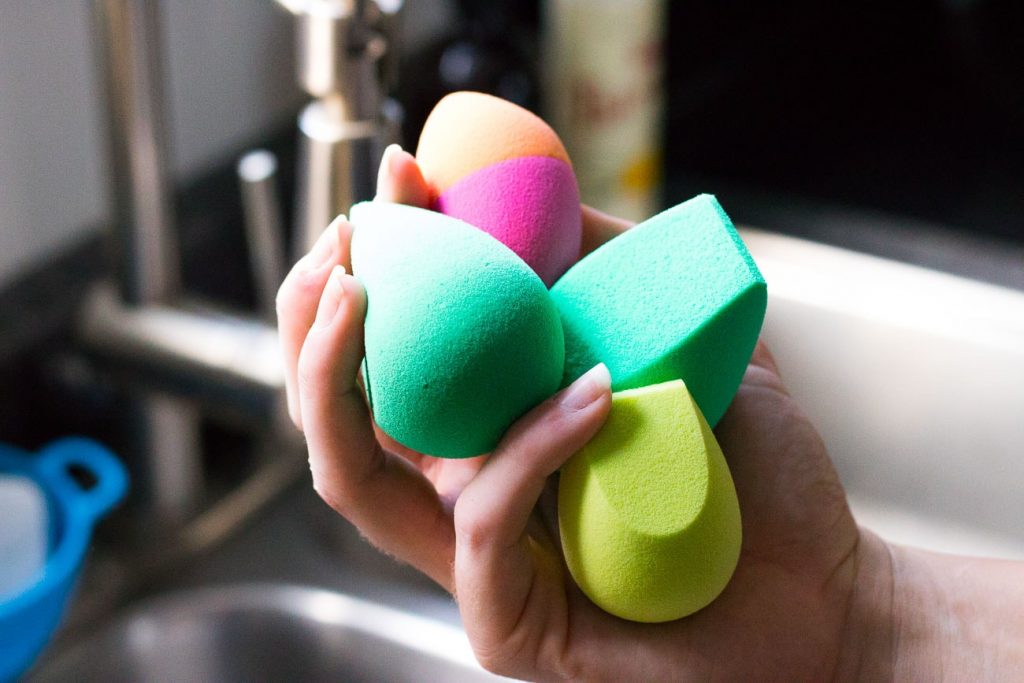
Keep repeating this step, rinsing out in between, until all the stains are gone and your water runs completely clear again!
Leave the sponge out to dry overnight, and you’ll end up with a brand-spankin’ new sponge in the morning! Voila!
 I know this post was much shorter than many of my normal posts, but that’s just because of how easy and simple this process is! Two steps, one product, boom. Clean sponges.
Remember, click here to read so much more about beauty sponges if you haven’t already!
And, as always, don’t forget to sign up to receive your FREE “Ultimate Makeup Must-Have Guide” that I promise you will find super useful!
Liked this post? Pin it for later!


Girl we all need this post! I know I’m guilty of letting my sponges get super gross LOL
Haha so am I! As you can clearly see in the “before” pictures lol. Need to be more consistent!
Thanks for this post. I hate how fast my BB gets dirty and how long it takes me to recover its original colour!!
I agree, but with this method…it’s like they’re good as new! Glad you enjoyed. 🙂
Bitcoin rate is growing. Become a millionaire. Get a passive income of $ 3,500 per day.: http://prosatholsubs.tk/b9jq4?&mseqv=RGXrB1
Tinder for Adults: The 5 Best Senior Dating Sites: http://tsunucnfulmoms.tk/g2y7?gEQRkprA7cwDlG
I’m 23. I have $30000. How can I best use it to make more money: http://toybrigchipreu.tk/t77d?&zfssq=wwFQlolBSgFVy
The Best Casual Dating Apps: http://largansrambbil.cf/6kbom?3MUdALx
10 Best USA Dating Sites (2019): http://seasembcomca.ga/dco6?&wulsz=dF9kREPbcfXs9
Top 5 ZA Casual Dating Sites 2019: http://cyadegara.cf/glye?DsRgkV
Meet a sexy girl right now (3198 single women in your location): http://doojeftellra.tk/4kymw?&dfdcn=LaQnHmy
What’s the easiest way to earn $30000 a month: http://oropepop.tk/v4gcc?&xnnji=N5vOWY2OoMga
Top 5 UK Casual Dating Sites 2019 (4233 sexual single women in your city): http://quijuseacsa.tk/3su6?&tppuj=507SqI8Gl2
10 Best USA Dating Sites 2019: http://mamunmeimor.cf/k1o3f?&xtsoh=XCSz2Wdqbe
10 Best USA Dating Sites 2019 (2163 single women in your city): http://longmormode.ga/g4loz?M6iYsaPuQC
What’s the easiest way to earn $30000 a month: http://daubladican.tk/q2l6t?&riazf=6XatXFZEEl3lUm
I’m 23. I have $30000. How can I best use it to make more money: http://frutmidossu.cf/5dhr9?&zcddq=39PgDWtty
10 Best UK Dating Sites 2019 (4884 single women who want sex in your location): http://go-4.net/fSQR?&wkzle=BYEXdvG
How To Find Local Sex On Meet N Fuck (5912 single girls in your location): http://v.ht/Pfihuf?FuM0Ei4
10 Best Dating Sites 2019: http://v.ht/s3HuOW?wEKUxQED
How to make $3000 a day: http://v.ht/GJ8H3h?&rehrb=dj4Xpfpdj9pc
How to make $10,000 Per day FAST: http://v.ht/NEw3T?&tmqmx=HfGxd2ZRKzlS
Get $1500 – $6000 per DAY: http://v.ht/uNK2K?ycUZgp
Casual Dating – Beste Dating-Sites: http://v.ht/VVrQzF?&beajv=ktl8F7OAj
Spread your happiness in your life by using this lovely discounts on plan.
Gay DVD Empire coupon code