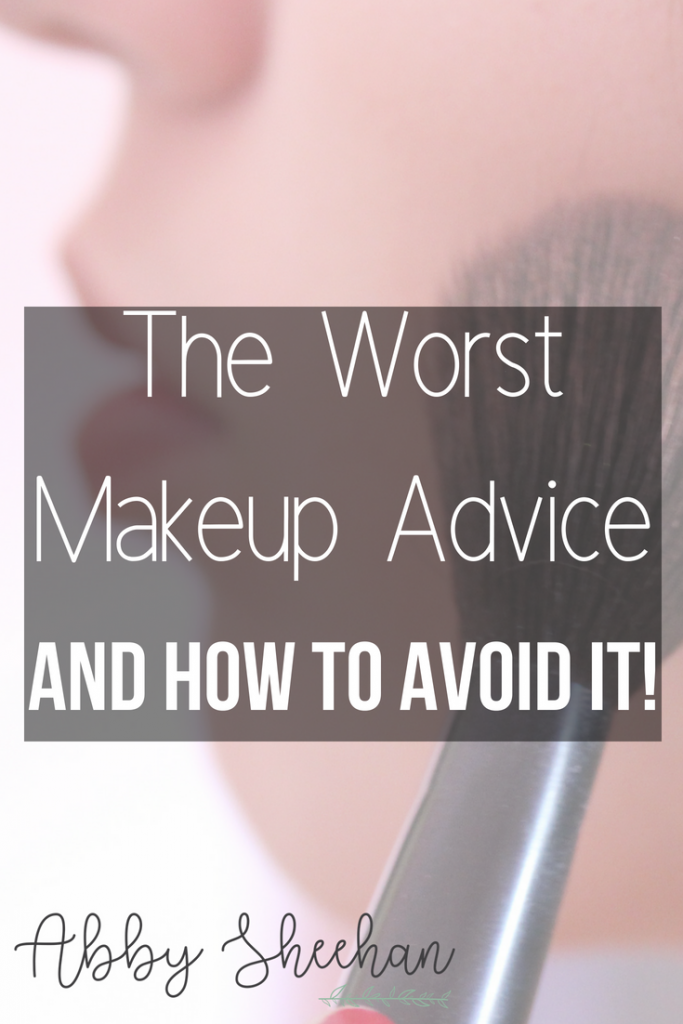
 If you’re a makeup beginner (like we all have been at some point in our lives), then I have some advice for you!
Today I am sharing some of the worst makeup advice I have ever heard or read.
The internet is full of some scary stuff – so I’m here to guide you in the right direction.
Let me fill you in on some of the bad advice to avoid to help you execute a flawless face of makeup.
Disclaimer: of course every bit of advice I have can be taken with a grain of salt. Makeup has no rules, so as they say: you do you! If you disagree with any of my “makeup don’ts”, that is totally fine…just ignore it and keep on doing what you love and what makes you feel confident with your makeup.
Without further ado, let me introduce you to some of the worst makeup advice I have ever come across (and my personal suggestions!)
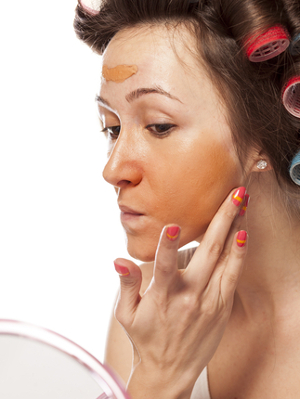
Bad Advice #1: “Pick a foundation slightly darker than your skin tone to look tanner.”
Click the image to read another helpful article about foundation for beginners!
I know that my pale self is dying for some bronze and tan foundation in the dead of winter. It is so tempting to pick a foundation a few shades darker to look beautifully golden, right?!
Instead: Match your skin and then darken up with some bronzer.
Resist the temptation! No “glow” or “tan” you think you might be getting is worth looking like an orange Oompa Loompa who doesn’t match the skin on the rest of her body.
When picking out a foundation shade, it is important to match the skin on your neck. Many people (myself included) don’t always tan as much on their face as they do on the rest of their body. If you match your foundation to the skin on your face, you might end up with the opposite problem – a face a tad too pale for the rest of your body.
Pick a foundation that matches the color and natural undertones of your neck (and don’t forget to blend it down past your jawline!)
Bad Advice #2: “Rub your foundation in quickly with a foundation brush – or your hands for quicker results!”
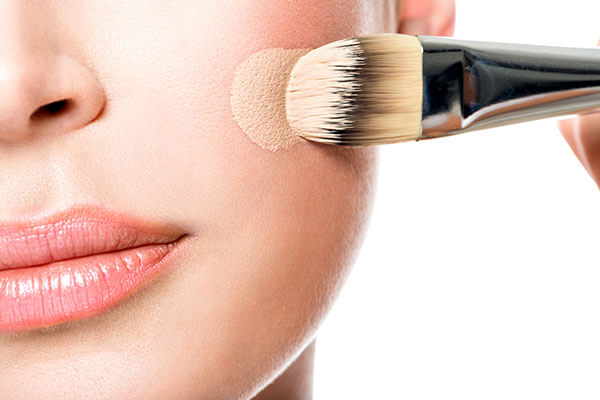 Who’s got time to spend forever on your foundation? I know you just want to throw it on your face and rub it around quickly…maybe even with your hands if you’re in a hurry!
Instead: Lightly dab/stipple your foundation into your skin with a brush or a beauty blender – always using a light hand.
Gosh this is one that I know I was sooooo guilty of in the past – and still see so many girls do today!
First off, using your hands can be extremely unsanitary (even if you washed them before) and can cause you to actually push bacteria into your pores. No one wants unnecessary breakouts!
Always use a brush or a beauty blender. Click here to read more about my favorite brushes, and click here to read more about why I love beauty sponges!
Patience is a virtue, and this is definitely true when it comes to makeup application. When applying your foundation, take your time and don’t rub any makeup into your skin. Stick with light, dabbing motions to slowly blend all of your makeup into your skin and allow it to melt into your face. This will leave you with a natural, flawless finish.
Bad Advice #3: “Choose an intensely light concealer to brighten up your under-eyes.”
 Kim K definitely started this “bright under-eye” trend that we are now seeing everywhere! This trend may have you grabbing the lightest concealer you own to brighten up those dark circles.
Instead: Use a concealer just barely lighter than your skin tone and then brighten more with translucent powder.
Kim K herself has even admitted that she cringes at her bright white under-eyes she used to rock. We are all pretty much in agreement that we need to back off that trend a bit!
Make your under-eyes look bright but natural by using a concealer a shade or two (no more!) lighter than your foundation. Next, set with a brightening translucent powder to avoid creasing.
I recommend the RCMA No Color Translucent Powder (talked about in this post!), Laura Mercier Translucent Powder (expensive but worth it), or Maybelline Fit Me Translucent Powder (cheap drugstore alternative!)
Bad Advice #4: “Apply your under-eye concealer with a few dots on your undereye bags.”
It makes sense to apply your concealer directly on the actual spots that you see bags/dark circles. Can’t you just put a few quick dots on each eye and then blend in?
Instead: Apply your concealer in a large, triangle shape to brighten up your face.
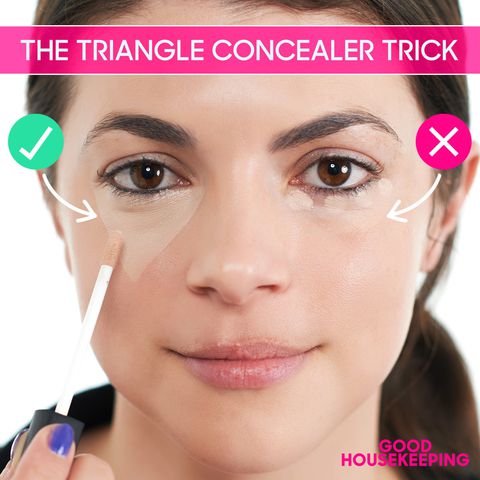
This image from Good Housekeeping is super helpful!
Going along with the tip before – let’s change the shape in which we apply our concealer to make everything look so much more natural!
Place your concealer wand in the inner corner of your eye, then drag down past where your under-eye ends. Next, draw a line up towards the outer corner of your eye, making a triangle shape. Then, lightly fill in that triangle with concealer. This creates a large shape, so don’t over-do it with how much concealer you apply.
Finally, lightly blend all of the product into that entire area with a damp beauty sponge (again, click here to read more!) A beauty sponge will soak up any excess product, in case you went a little too cray cray with the concealer.
Now your under-eyes should be covered and bright, but blend naturally into the rest of your face!
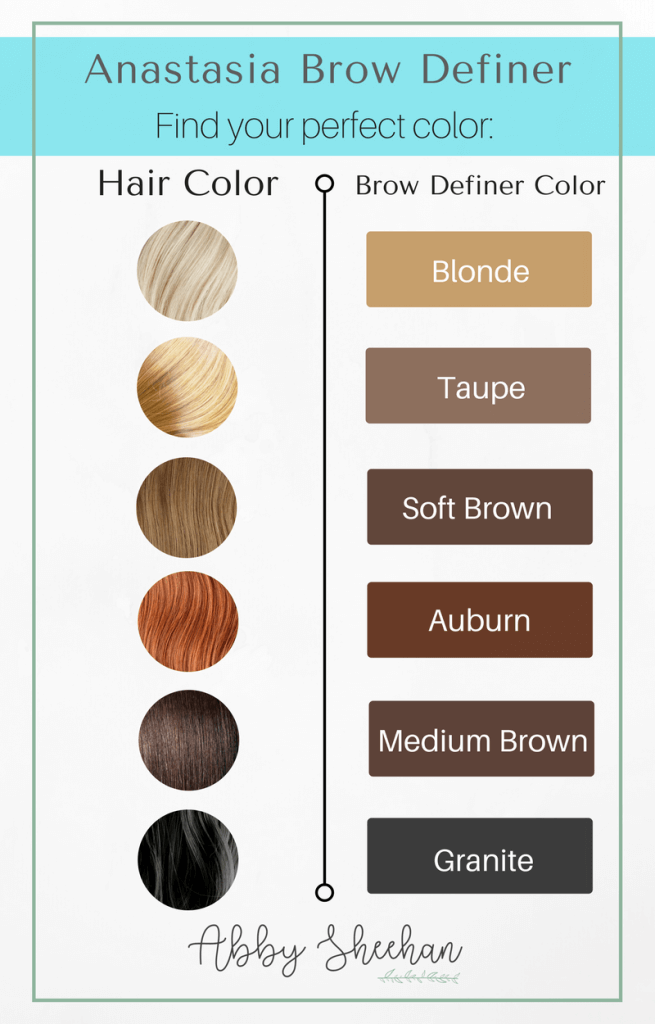
Bad Advice #5: “Super dark, bold, intense brows are in style!”
This is definitely another trend we’re seeing everywhere. You may find yourself wanting to fill in your brows much darker than natural to make them as intense as the IG models!
Instead: Darken your brows with only one shade darker for defined, yet natural brows.
I totally get wanting to have those trendy, super dark brows you see all over, but we have to be realistic here. Brows four shades darker than the rest of your hair just isn’t always the cutest look.
Instead, opt for a shade similar to your brow color – a bit lighter if you hair on your head is lighter! Click here to read more about why I love beauty sponges! Or check out the helpful graphic I created below if you’re using my personal favorite, the Anastasia Brow Definer!
 Bad Advice #6: “Draw your eyebrows into the shape you want!”
My dream brow!
I am so guilty of wanting a more dramatic brow shape. I would kill for a dramatic arch, instead of my semi-flatline brows! Can’t I just ignore my brows and draw in what I want?
Instead: Follow your brows natural shape – filling in to define.
Again…please keep your brows as natural as possible. It is still possible to define them and make them bold without overdoing it! I totally understand because I would do anything to change the shape of my brows! However, God blessed us with what we got so we need to embrace it!
Follows the natural shape of your brows, outlining and filling in as needed. Again, check out my ultimate eyebrow post here for all the brow info you’ll ever need!
Bad Advice #7: “Use a dark bronzer to look beautifully sun-kissed!”
 Again, in the dead of winter, it is so tempting to grab the darkest bronzer I own and cake it all over my face. Add some shimmer in there, and you might feel like you’re “naturally” glowing!
Instead: Use a cool-toned matte bronzer to contour and a warm (but not orange) bronzer to bronze.
A huge makeup mistake I see people making is not understanding the difference between bronzer and contour.
Contour: Use a cool-toned matte powder to chisel out and define your cheekbones, jawline, and around your hairline. Counter is simply used to enhance your natural face structure and make some facial lines more defined.
Bronzer: Use a warm (slightly shimmery if you want) bronze color that is not too dark for your skin tone. Apply this about the same areas as you did your contour, but it’s okay to be a bit more generous and not as precise with your bronzer. This is used for darkening up your entire complexion and making you bronzed and glowy!
Bad Advice #8: “Line your entire eye in black to make your eyes pop.”
 Hello, Avril Lavigne circa 2008 called. She’s telling you to just line that whole eye in jet black – top and bottom! Your rocker-chic eyes with definitely pop!
Instead: Line your upper lash line in black, and smudge out shadow on the lower lash line (the same shadow you used on your lid.)
This is another one of those tips that I need to disclaim – if you like the way your eyes look with eyeliner on the top and bottom lash line, go for it! Do whatever you love and whatever you think looks good on your eye!
However, I find most of the time that black eyeliner around the entire perimeter of your eye will close them in and make them appear small.
If I am using eyeliner (which I don’t even always wear), I only apply it to my upper lash line. Click here for so much more eyeliner information on products and techniques!
Then, on my bottom lash line, I simply smudge out the same color(s) I used on my lid, to make it defined but not too dark.
Bad Advice #9: “Overline your entire lips to make them plump and gorgeous.”
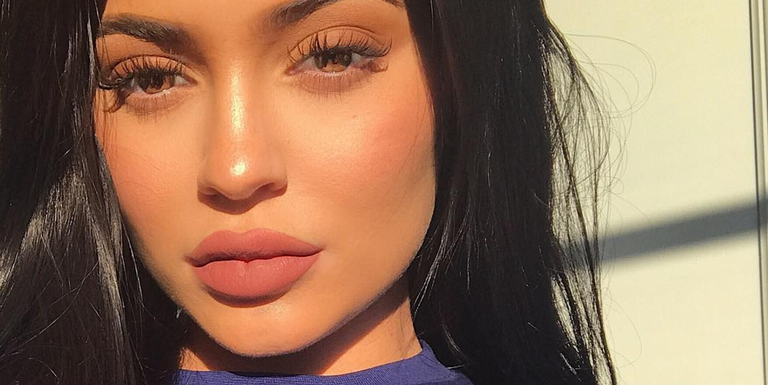 Who needs lip filler when you can overline your lips with liner, right? Your inner Kylie Jenner is going to be tempting you to overline the entire outline of your lips to get that plump pout.
Instead: Slightly overline (if you prefer) on the sides of the top lip only – meeting the natural corners of your lips.
Again, you do you boo….but I just think the hyper-overlined lips trend is a bit much on most people. If you are going to overline your lips (we’ve all done it!), keep it as natural as possible.
I would recommend only overlining your top lip. Start at your natural cupids bow, and slightly overline with your lip liner until you get down to the corner of your mouth. Then, meet your lip liner back up with the natural corner of your lip. If you overline the corner of your mouth, it can end up looking a bit clownish!
My best advice is to resist the temptation and leave the bottom lip completely natural. It can end up looking obvious if you overline the bottom!
One more reminder that makeup has no real rules! Apply your makeup in whatever way makes you feel beautiful and confident…and then rock it, girlfriend! These are just my personal tips and opinions based on what I have seen others do and what I have learned myself. Hopefully they helped you!
What is some of the worst makeup advice you have ever heard? Have you been guilty of any of these (like I totally have!) I would love to know!!
Liked this post? Pin it for later!